Now this was back in July but I thought the idea was worth sharing. My daughter's very wonderful Kindy teacher announced that she was retiring and it just happened to be at the completely wrong time for our families budget for me to be able to buy her a good-bye present, so I decided that I was going to have to make something.
Last Christmas I made wheat bags (microwaveable heat packs) for many of my colleagues, family and friends for Christmas, so i new how to make these bags and I had plenty of left over wheat - comes in really cheap 20kg bags from the pet/farm feed places. What I didn't have left over was suitable fabric. Fabric needs to be 100% cotton and fairly heavy weight. I ended up looking through my rag/throw-out pile and found two old pairs of hubby's shorts. He couldn't wear them any more but there was plenty of useable fabric. I gave them a wash and then cut out enough rectangles of fabric to make 4 heat packs.
 |
| Pair of old shorts |
 | ||
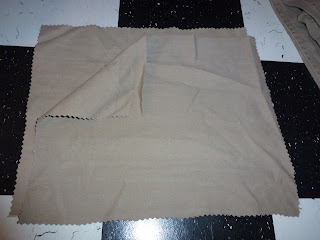
| pair of rectangles cut out of the shorts (approx 23cm x 28cm or 9 inches x 11 inches) |
 |
| place the right sides together and stitch all the way around, leaving an opening (approx 5 or 6cm) |
 |
| It isn't completely necessary but i usually zigzag around the edge |
 |
| I filled the bags with 4 cups of wheat so that they were about half full. I always use four cups because I know how long they need to be microwaved in my microwave. |
I was very pleased with the end result; I'd made a personalised gift that cost me nothing but time and it was very practical (especially as the weather was cool at that time). Miss 4 was grinning from ear to ear as her teacher opened the present that she had helped to make.


No comments:
Post a Comment