Sunday, 16 December 2012

Kids Teepee

I was looking to make something a little differnet as a Christmas gift for a  nephew and I remembered that I'd seen a teepee pattern that looked pretty east to follow. The pattern used a "Twin sheet" which I worked out from the measurements is a single bed sheet in Australia. Here's the link to the original "Twin Sheet Teepee".
I decided to hunt down some cheap fabric to see how I went making one. I went through the marked down fabrics at Spotlight and I picked up a piece of fabric that was 145 cm X 266cm (Narrower and longer that the sheet used in the original pattern). As the original pattern involved triangles that then had their tops cut off, I figured I could re-arrange the pieces a bit to fit it in. Who would have thought that highschool triganometry could come in handy in real life!

If anyone is going to make their own, you should note that the fabric must be double sided (same on both sides), as one of the door flaps needs to have the wrong side facing out.
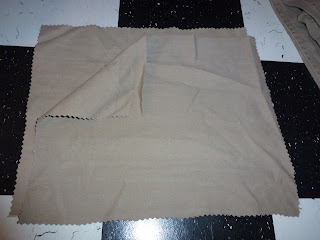
Mark out the fabric and cut into triangles
The measurements I used ( I had intended to make the pieces another centimetre or so wider but there was only2.66 metres of fabric left on the roll).

A small hem on the top and bottom of all pieces. I didn't bother rolling it over twice since this is a selvage edge anyway. I'm making a calico teepee at the moment and I don't intend to do this step at all since the selvage edge is so clean looking.
I overlocked and then hemmed the vertical section of the two door pieces
This was the only bit I found to be tricky. One or the door pieces is too big at the top (so that you get some over lap at the bottom of the door) and the other door piece is about half the width of the other panels. I put the smaller door piece on top of the larger piece and measured from the side of the larger piece and marked off 11cm (the size of the top of all of the other panels). I pinned the top (smaller) door panel to the larger piece so that side of the panel lined up with the 11cm measurement  and the hemmed part of the door was roughly in the centre of the larger piece.
I pinned the piece in place so that door panel was now the same overall size as the other panels. To make sure that it was straight I measured from the side hem of the small door piece to the side hem of the larger door piece.


I then made sure that the side seams remained the rame distance apart (meaning that I'd pinned it straight)
Sew the two door pieces together. I sewed down the front piece's hem about 50 to 60cm and then across the top of the door to the side of the panel.I re-enforced the stitching because I figure it will really get a work out.

I sewed the top door piece to the lower door piece along the diagonal just to keep the two pieces together for the next few steps. I then cut off the little triangle piece


sew all ot the panels together by sewing the right sides together down the entire legth of the side. I over locked mine but you wouldn't have to as the seam will not be seen.

Turn the teepee right side out and sew a casing down each of the seams. Each line of stitching was 4cm from the side seam.

The end result is five casings for the poles.

Insert the poles and it's done. The poles are 5 x 20mm PVC pipes but you could use dowel or bamboo(180cm long, although the ones in the photo hadn't been cut down and are 2m. On the site I got the idea from, the poles were left long and flags were hung from them).

Enjoy (indoors or outdoors)!!!!!!


Tuesday, 11 December 2012

Reindeer food

When Miss 4 received candy canes and cards from child care it made me think that we really should be doing something similar but I don't like feeding other people's kids sugar. I decided that we'd go with an idea I've used before: Reindeer Food.
 I made 45 Bags of Reindeer Food using 1 1/2 kg rolled oats (Miss 4 wanted regular and the quick cooking oats becasue she thought the reindeers would prefer that!!!), 1/2 cup of green sugar, 1/2 cup of red sugar and a packet of cake decorating sprinkles. Each bag used about 3 tablespoons of oats and a bit under a spoon of sugar (both colours combined) and a teaspoon of sprinkles.
I made my own coloured sugar by adding a few drops of food colour to 1/2 cup of sugar and stirring it through.
 I've seen lots of variations for this mix on the internet including: with glitter or sequens and without the coloured sugar.
I used a label and poem downloaded from this blog.

These are the packs I made last year.


Monday, 10 December 2012

DIY wrapping paper

A friend gave us a pile of butchers paper that I thought I could turn into wrapping paper. My vision was that I could get the girls (2 and 4) to help me stamp the paper with potato stamps in red and green to make it Christmassy and they'd have some fun while they were at it. I sort of saw a prouction line in my head. The reality was quite different but still lots of fun.
production line under way

Red and green stamped stars and Christmas trees
Apparently stamping wasn't fun enough
Must not leave the kids unattended for even a minute while they're painting


I'm still using the paper, even though it isn't quite what I envisaged, because family will appreciate the effort. (Family - You WILL appreciate the effort. OK!!!!!)

Handprint baubles

Every year we get at least one new decoration for the Christmas tree, this year we made some (or at least decorated some that we bought). I painted the kids' hands with some house paint (I needed something that would stick better than poster paint and this is all I had in white) and got them to put a hand print on a bauble. I quite like these baubles because they're clear plastic with gold glitter stuck to the inside, this means that the outer surface is smooth. I was going to use a plain bauble but I think this is better (and only $3 for 2 from Kmart!!!) I just made sure that the bauble I bought was big enough for the oldest child plus their details.

This really shouldn't have been tricky but we did struggle a bit to get a good quality print (especially as I wanted to make them for the Grandparents as well).

 I bought a white paint pen and wrote the child's name, age and the year. I gave them a coat of clear sealer so that they should last quite well.

Sunday, 25 November 2012

Santa Advent Calendar


Santa's count down beard
I added some cotton wool to Santa's hat


I saw this quite clever Santa advent calendar recently on Pinterest but I had trouble opening up the file , so I printed out the photo and traced the Santa and typed up the dates. 

I'll get my girls to cut off one number per day to indicate how many days are left until Christmas. 
The site I got the idea from had a really cute printable file (I just couldn't open it on the computer I was using at the time). Find site with printable file here. 
That site referenced another as the source of the original idea. The original site did it differently with cut paper. click here for cute cut alternative.

Thursday, 8 November 2012

Hot Chocolate on a Spoon

Recently I wanted to give a gift to a colleague and his wife who had just had a baby, but I'd already put money in for the present that my staffroom bought for them. I decided to make them a couple of little things that were just from me. One of the things I made was some "Hot Chocolate on a Spoon".

Melt the chocolate in a microwave-safe, glass jug (or similar). I heat the chocolate for 30seconds then stir it and heat it for another 30 seconds. I keep doing this until the chocolate has melted. Be careful not to get any water in the chocolate (i.e. from a wet spoon) because the chocolate turns to crystals and becomes useless.

Pour the melted chocolates into moulds. I used ice cube trays because I think that one cube is about right for one cup of hot chocolate. I've seen other people add marshmallows to the top of the chocolate at this stage to make "Hot Chocolate and Marshmallow on a Spoon". Allow the chocolate to cool and place a spoon in the centre of each cube then leave the cubes to completely set.

When the chocolates have completely set, remove them from the moulds, package them up and add a label.

 I added the following label to my chocolates.


Hot chocolate on a spoon
Microwave instructions
Place one "Hot Chocolate on a Spoon" in a mug and then fill with milk. Heat in the microwave for one minute then stir. Heat for one further minute and stir again. (If the chocolate still hasn’t all melted you may need more time in the microwave.)
Stove top instructions
Heat one cup of milk in a saucepan. When the milk is hot, stir in one "Hot Chocolate on a Spoon" and keep stirring until the chocolate has all dissolved. Pour the hot chocolate into a mug and enjoy.
200 grams of chocolate made 6 and a half cubes (I ate the half!). I've also made "Hot Chocolate on a Stick" by using paddle-pop sticks instead of plastic spoons. In the past I've made these using cheap chocolate (home brand/no frills) and the result is ok but the resulting hot chocolates are only as good as the cheap chocolate. Better chocolate makes better hot chocolate. This time I used Aldi brand and I was happy with the outcome.

I think I might make some of these for Christmas presents.

Saturday, 13 October 2012

Up-cycled heat pack present

Now this was back in July but I thought the idea was worth sharing. My daughter's very wonderful Kindy teacher announced that she was retiring and it just happened to be at the completely wrong time for our families budget for me to be able to buy her a good-bye present, so I decided that I was going to have to make something.

Last Christmas I made wheat bags (microwaveable heat packs) for many of my colleagues, family and friends for Christmas, so i new how to make these bags and I had plenty of left over wheat - comes in really cheap 20kg bags from the pet/farm feed places. What I didn't have left over was suitable fabric. Fabric needs to be 100% cotton and fairly heavy weight. I ended up looking through my rag/throw-out pile and found two old pairs of hubby's shorts. He couldn't wear them any more but there was plenty of useable fabric. I gave them a wash and then cut out enough rectangles of fabric to make 4 heat packs.
Pair of old shorts

pair of rectangles cut out of the shorts (approx 23cm x 28cm or 9 inches x 11 inches)

place the right sides together and stitch all the way around, leaving an opening (approx 5 or 6cm)
It isn't completely necessary but i usually zigzag around the edge
turn the bag out the right way by pushing one corner through the opening and then pulling the rest behind it. In the other bags I made I actually clipped off the corners so that they sat nicely when turned out the right way.
I filled the bags with 4 cups of wheat so that they were about half full. I always use four cups because I know how long they need to be microwaved in my microwave.
I sewed the bag closed using the machne, as this bag (and two others) were staying in my own home, I didn't bother to finish it off nicely, on the ones I gave away I top stitched around the edge to finish them off
I gave Miss 4 the fabric for this heat bag before I sewed it together and a packet of fabric markers. She spent quite a lot of time decorating the fabric for her teacher. When she was done I fixed the ink by ironing it according to the packet's instructions. I also washed the fabric, dried it and ironed it again, so that no excess ink would rub off onto the user.


I was very pleased with the end result; I'd made a personalised gift that cost me nothing but time and it was very practical (especially as the weather was cool at that time). Miss 4 was grinning from ear to ear as her teacher opened the present that she had helped to make.